How to generate PDF417 barcode for Driver's License
Generate PDF417 barcodes for the first time?
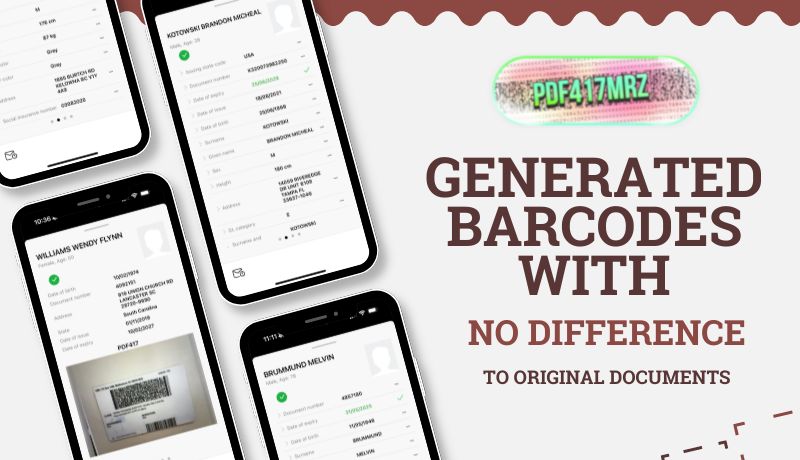
Do you want to generate authentic PDF417 with no difference to the barcode placed on the original Government issued document? Now it’s simpler than ever! Use our solution and you will be golden with your new barcode generator.
You faced some troubles during the generation, because the process is not exactly the same as it was on the website we all know? Maybe, this is the first time you generate PDF417 barcode and do not know exactly how it should work – no worries at all.
This article is especially written for you. You will understand the basic principles of PDF417 encoding and what data is encoded to barcodes. With knowledge received from this article and our PDF417 barcode generator solution you will be perfectly ready to generate authentic barcodes without any difference to government issued documents.
Common issues during PDF417 generation
During this article we will explain in detail each step of the barcode generation, moreover we will stop on each field of the form you need to fill, rendering the data and meaning of it. We will use the real driver license and show on the real instance how you should work with our bot.
But, before the start, here is the quick and simple tip that will make all your ID verification tries more accurate:
- Data encoded in your barcode SHOULD ALWAYS BE THE SAME as data typed on the front page of the document.
- Most anti-fraud systems during the ID verification use simple methods: they gather data from decoding PDF417 barcodes placed on the back side of the document and comparing them with what is typed on the front side of the same document. Typically, anti-fraud systems flag the verification as high risk ones if they find opposites in data.
- Always double-check data you provide to the pdf417 generator and compare them with what is typed on the front side of your document.
Step-by-step guide on how to generate PDF417 barcode
Select the form in bot and open it in browser
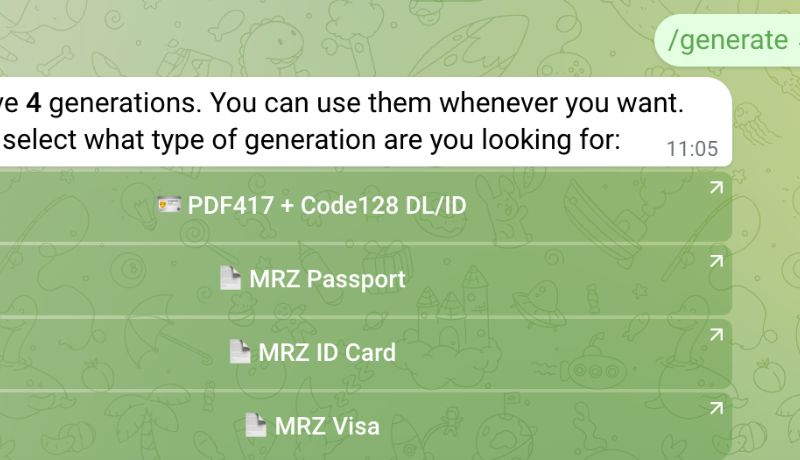
Start PDF417MRZ Bot in Telegram, select the language, use /generate command and click “PDF417 + Code128 DL/ID”. Confirm that you accept redirects and open the form for barcode generation in the web browser.

Please, pay attention that you can select the form language and the color theme in the right top corner of the form. It will not impact your generated barcode and was made just for your comfort.
Country, State, Document Type, Revision, Name and Truncation

Select the Country issued the document for which you try to generate barcodes. After the field Country is selected, the selection fields State and Document type are filled with available options. These two fields depend on the selected Country.
For instance, if you choose Canada, the field State is filled with Canadian states. In some countries the fields State or/and field Document type are disabled, since exactly the same barcode format is used on the documents issued in different regions of the country. For example, the selection of Argentina as a country will disable fields State and Document type since this data is not used in Argentinian barcodes and have no impact on anything.
The last field of the row is the Revision of the document to which you generate barcode. Let’s say this is a more professional field. If you do not know the revision of the template of the document you use – just left this field empty. It will be filed automatically after you enter the date of issue of the document.
If you know the revision of the template you used to draw the document – please select the right one. Also, please pay attention:
- This field is filled with values depending on the State selected by you. Each state has its own reviews.
- The field will automatically change its value after you provide the date of issue of the document.
- The revision of the document is always in the next format MMDDYYYY – its the date when the State started to use it.
- If you change the date format, then the revision will change its format too.
- Its very-very unlikely that the date of issue will be less than the revision date. The document issued on 31th May, 2021 cannot use the revision of 22th April, 2022. Because this revision was not available on the date of issuing.
Last name, First name, Middle name are text fields. Please, fill them exactly as the typed on the document. If the middle name on the front side of the document is typed as “M.” it means that you should fill the field Middle name as “M.”. Usually, the last name is after 1 on the front side of the document, but, please, double-check it in the legend of the document.
Name truncation is the selection value. You can select from “Unknown”, “Yes” or “No”. Fill it with “Yes” if Customer last name, first name OR middle name has more than 40 symbols. Fill it with “Unknown” if the Customer’s Middle name has a dot, for example “M.”. In any other cases use “No”.
Dates, Document number, class and compliance

Birthday date, Issue date and Expiry date are very similar fields. Please, pay attention that you should fill them with exact dates placed on the front side of your document.
By default, the format date is American ( MM/DD/YYYY ) but you can change it by clicking the Format button on the left side of each of three fields. Now, we support next formats:
- American – MM/DD/YYYY
- Canadian – YYYY-MM-DD
- Argentinian – DD.MM.YYYY
After you change date format, all filled dates will remain as such and will simply change format according to your choice. For instance, you have used the American format and filled the Birthday date with 06/25/1998. If you change format to Canadian, the Birthday date will be filled with 19998-06-25.
Each of three date fields also have an Auto button. It will generate the value of the field automatically. Expiry date depends on Issue date and sometimes (depends from the state) on Birthday day. It means, that if you will try to auto generate Expiry date without filled Issue date field – you see an error.
Document number field, as some other fields in the form, has a clipboard icon on the left side of the field. The value of the field will be copied to your clipboard If you click on the field with a clipboard icon that has a value. Make sure that the Document number field is filled with exactly the same value as typed on the front side of the document.
Auto button generates the document number automatically. Document number depends on very different data, that varies from one state to another. For instance, for Florida you cannot auto generate a document number without filled Last Name and Birthday date fields.
You can type any value you want to the Document class field as well as select from proposed values by clicking on the lower arrow icon on the right side of the field. Pay attention that the document class in the form is the same as on the front and (sometimes) back side of your document.
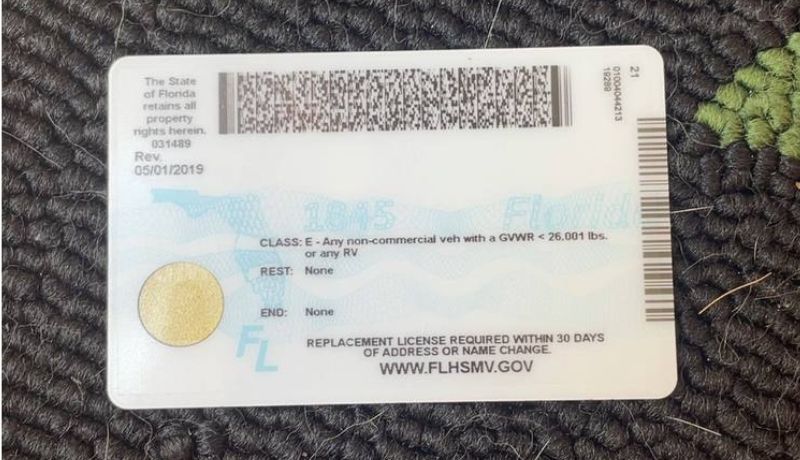
Select field Compliance has two values: “F” (stands for Federal) and “N” ( not federal IDs). IDs with federal compliance can be used in all states and countries, while IDs with opposed values can only be used in the states that issued the id. How to know if your ID is federal? Look carefully on the front side of your document, If you can see there the yellow star icon like on the picture below than this ID with Federal compliance:
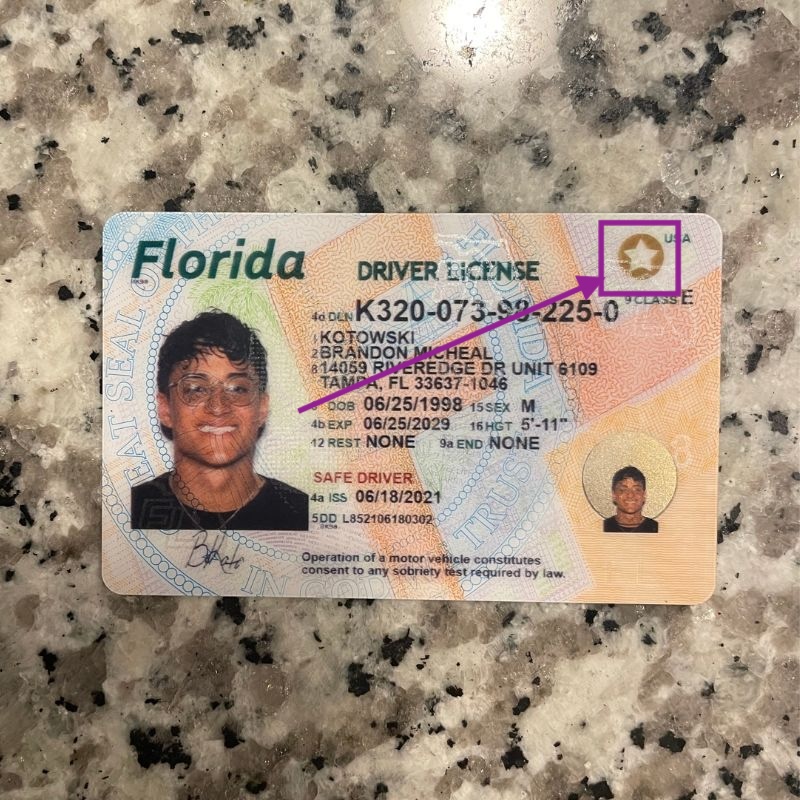
If there is no yellow star icon then the Compliance should be “N”. In our example, we generate barcode for Florida’s driver license where yellow star badge located on the front side of the document. ( See the image above ) The compliance option is “F”.
Badges, Restrictions, Endorsement, Discriminator, Inventory and Audit

There are three badges that can be placed on the document: Veteran, Donor or Safe Driver. In most cases information about these badges is encoded into barcodes. Active badges in our form are painted in turquoise color. Take a look carefully to the front side of your document. Click on each button that corresponds to the found badges. For instance, check the front side of the document from our example:
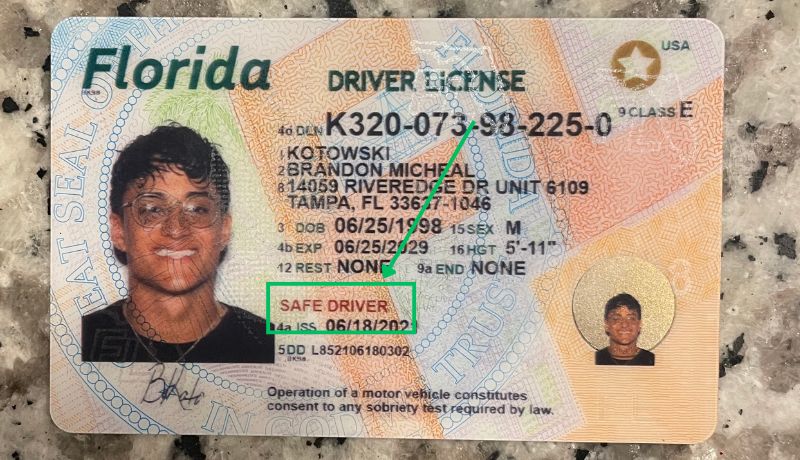
So, just one button is clicked – Safe Driver.
You can write anything to the Restrictions and Endorsement fields or just select the values by clicking on the lower arrow icon on the right side of the field. Just remember: same information type on the document should be encoded inside barcode. Please, make sure that selected values are the same as typed on the front and, sometimes, back sides of the document. In our example both values are “NONE”.
Discriminator field has a clipboard icon on the left side of the field. The value of the field will be copied to your clipboard, if you click on it when it has the value. Pay attention that this field is filled with exactly the same value as typed on the front and, sometimes, back sides of the document. Sometimes this field is named as “DD” on the front side of the document, just as in our example.
Auto button generates the discriminator automatically. Discriminator depends on very different data, that varies from one state to another. You cannot auto generate if you do not provide all required data and, after the click, will be scrolled to the required field.
Fields Inventory and Audit are pretty much the same. With the only difference that not all states use this data. These fields will not be shown in the form if you choose the state which does not require them. For example, The Florida state from our example does not use Audit so there is just an empty space on this place.
Height, Weight, Skin Color and Address

Sex, Hair Color, Eyes Color, Height, Weight and Skin Color are personal data related to the customer.
If the format of the barcode does not use some of this data then these fields will be disabled and just filled with value “Not required”.
Select the sex of the cusomer in Sex field. Available values are:
- Unknown – If the customer ask the issued office to hide this field.
- Male – If the customer is male.
- Female – If the customer is female.
- Others – If the customer identifies himself in some different way.
Select the Hair color and Eyes color from the select fields. Please pay attention to fill these fields with exactly the same values that are typed on the front side of the document.
If you generate barcodes for the United States the Height will be in feets and inches and it will be in meters and centimeters in case of any other country. The first field is for feets or meters and the second one is for inches or centimeters.
If the Height of the customer is 5’11’’ then the first field is 5 and the second one is 11. If the height of the customer is 185CM then the first field is 1 and the second one is 85. Please, make sure that same value is typed on the front side of your document.
Weight field is just the number. In pounds if it is the United of America or in kilograms in any other case.
Skin color is a rare field that meets just in a few states. If this field is active, select the value that corresponds to the color of the skin of the customer on his photo in the document.
Address and additional fields

Provide the customer’s address exactly the same as typed on the front side of the document.
Pay attention that data encoded in the barcode differs from state to state and in some cases can be really unique. For instance, in Ohio’s barcodes you need to provide the State where the customer was born. All these unique for each state data we call Additional data and you will be able to fill them in the fields appeared in the last row.
If the state does not require to provide any additional data – as in our example with Florida – the row will be empty.
Generate your PDF417 barcode for Driver's License
Click the Generate button. The form will be checked for accuracy if every data filled without mistakes – we send the data to generation. You will receive the message from our bot in Telegram with all generated barcodes in one zip archive.
In case where something went wrong or you do not understand the process or need any additional assistance - do not hesitate to ask for our support.
Barcodes on id documents from any states made in AAMVA standart If you want to know more about what data is encoded in PDF417 barcode – check AAMVA PDF417 officilal guide.